Piaware ADS-B Feeder Project
Building a DIY flightradar with Raspberry Pi
Why I did this
I was interested in learning about ADS-B, which is a technology used by aircraft to broadcast their position and other data. To explore this, I set up a local flightradar system using a Raspberry Pi and a software package called Piaware. This setup allows me to capture ADS-B signals from nearby aircraft and visualize their movements on a map.
The Stuff I Used
- Raspberry Pi 5 8GB
- MicroSD card 128GB
- Power supply for Raspberry Pi
- USB ADS-B receiver – FlightAware Pro Stick (yellow)
- 1090 MHz antenna
- 10m coax cable
- Passive cooler for the RPi5
- Software: Raspberry Pi OS (Bookworm), Piaware, FR24 feeder, dump1090
About Components
- Raspberry Pi 5 – A small, affordable computer that runs different OS/software. Great for low-power 24/7 projects.
- MicroSD card – Stores OS + software. 128GB leaves plenty of space for logs/data.
- USB ADS-B receiver – FlightAware Pro Stick is sensitive enough to capture signals from long distances.
- 1090 MHz antenna – Tuned to ADS-B frequency for clear reception.
- Coax cable – 10m run to place antenna in optimal location.
- Passive cooler – Keeps the Pi stable even in the attic without active cooling.
- Software – Piaware processes ADS-B signals and uploads to FlightAware. FR24 feeder pushes data to Flightradar24. Dump1090 decodes raw messages.
Installation
Putting the Antenna on the Roof
This was by far the hardest part of the whole project. I had to climb on the roof and secure the antenna behind my TV satellite dish which is not an ideal placement and you can see it on the heatmap. Then came drilling holes to route the coax indoors and sealing everything. The installation took around 2 hours and was risky — I almost fell off the roof multiple times. If you try this, I highly recommend using a tall ladder instead of climbing onto the roof like I did.
Heatmap
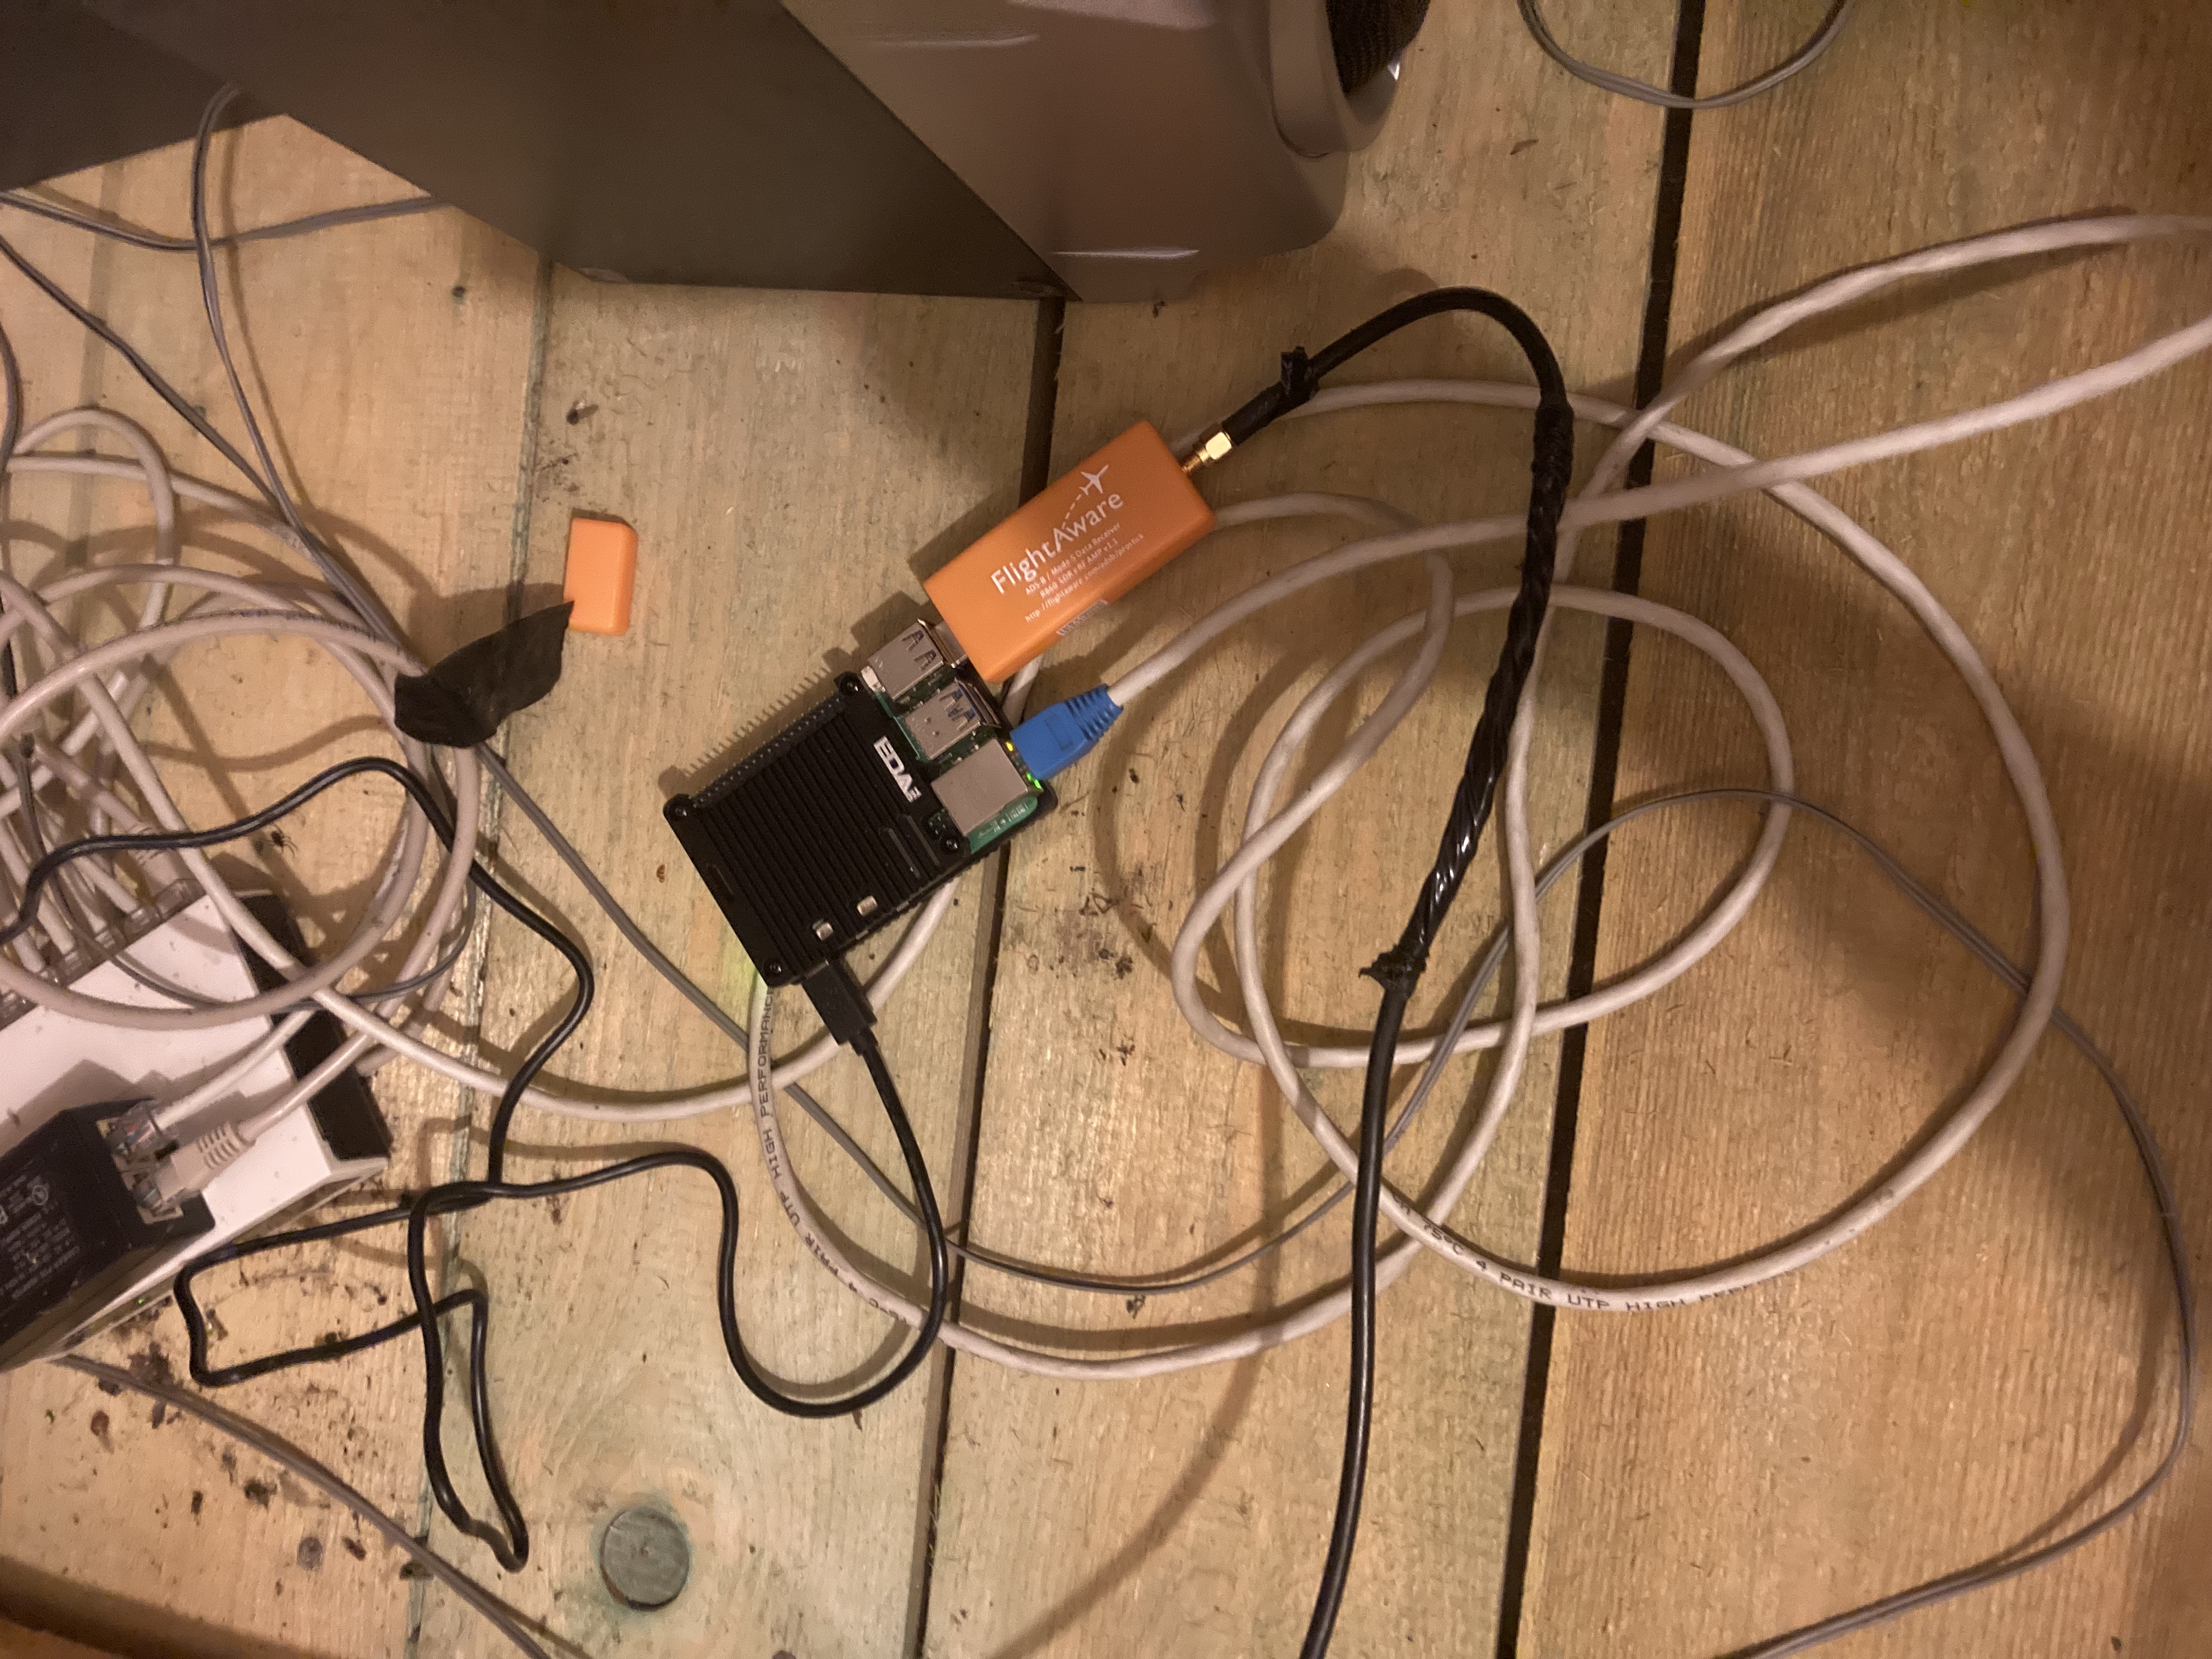
Installing the Raspberry Pi
I placed the RPi5 in the attic because that’s where the coax and router were. It’s connected with power, ethernet, and the USB stick. I was worried about overheating because the attic can get hot in summer, but even with just a passive cooler, temps never exceeded 50°C.
Raspberry Pi setup in the attic
Software Installation
I used Raspberry Pi OS Bookworm, but soon discovered Piaware and dump1090 weren’t officially released yet.
Since the Pi was already installed in the attic, I decided to build everything from source rather than re-flash.
Dump1090 built without major issues Piaware was trickier, but after ~3 hours
of struggling I got it running, it gave me local interface, after playing with it, I linked my feeder to FlightAware and received an enterprise account.
After that, I set up MLAT (multilateration) by entering my location to improve tracking accuracy using signals from other feeders.
I also wanted to feed Flightradar24. Their fr24feeder wasn’t ready for Bookworm either, and documentation
was bad. After trial and error configuring it to use dump1090’s data, which was a bit tricky, because the data from the stick, so I had to configure it to use dump1090 web interface and emailing support for an API key
(they require exact coordinates), I finally got it working. MLAT had to be disabled for FR24 since it was
already active in FlightAware.
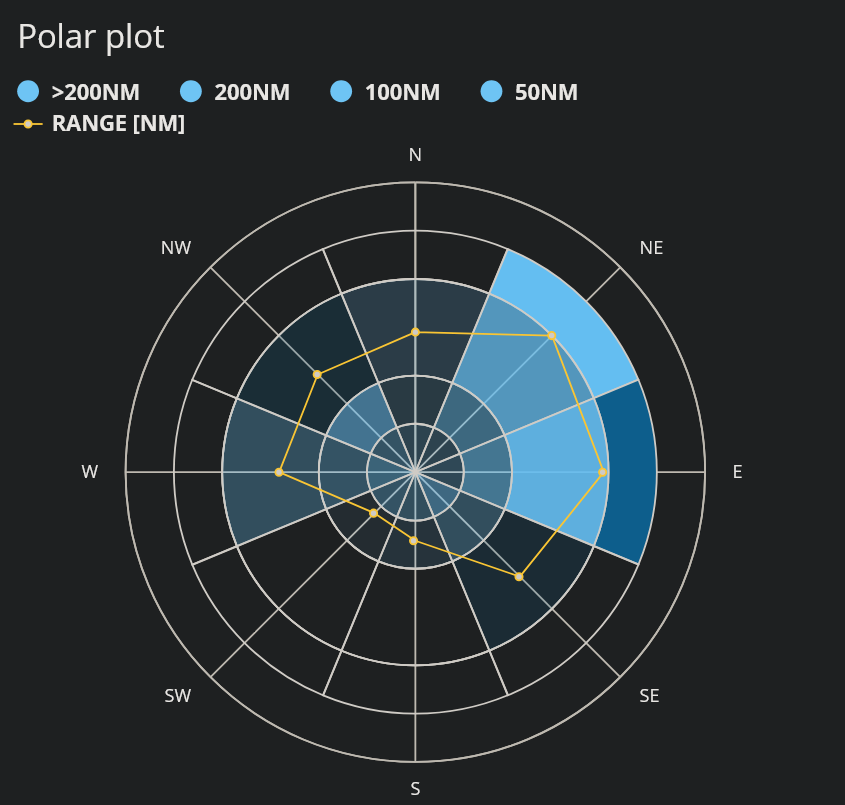
Results
Even with less-than-ideal antenna placement, I can track aircraft up to 250 miles away. As a pilot, having real-time access to traffic is very useful. Plus, both FlightAware and FR24 reward feeders with premium accounts — effectively offsetting the cost of hardware. Or at least that is how I justify buying new gadgets :)